Installation Guides

Oil Gauge/Dipstick - Aprilia 660
Video
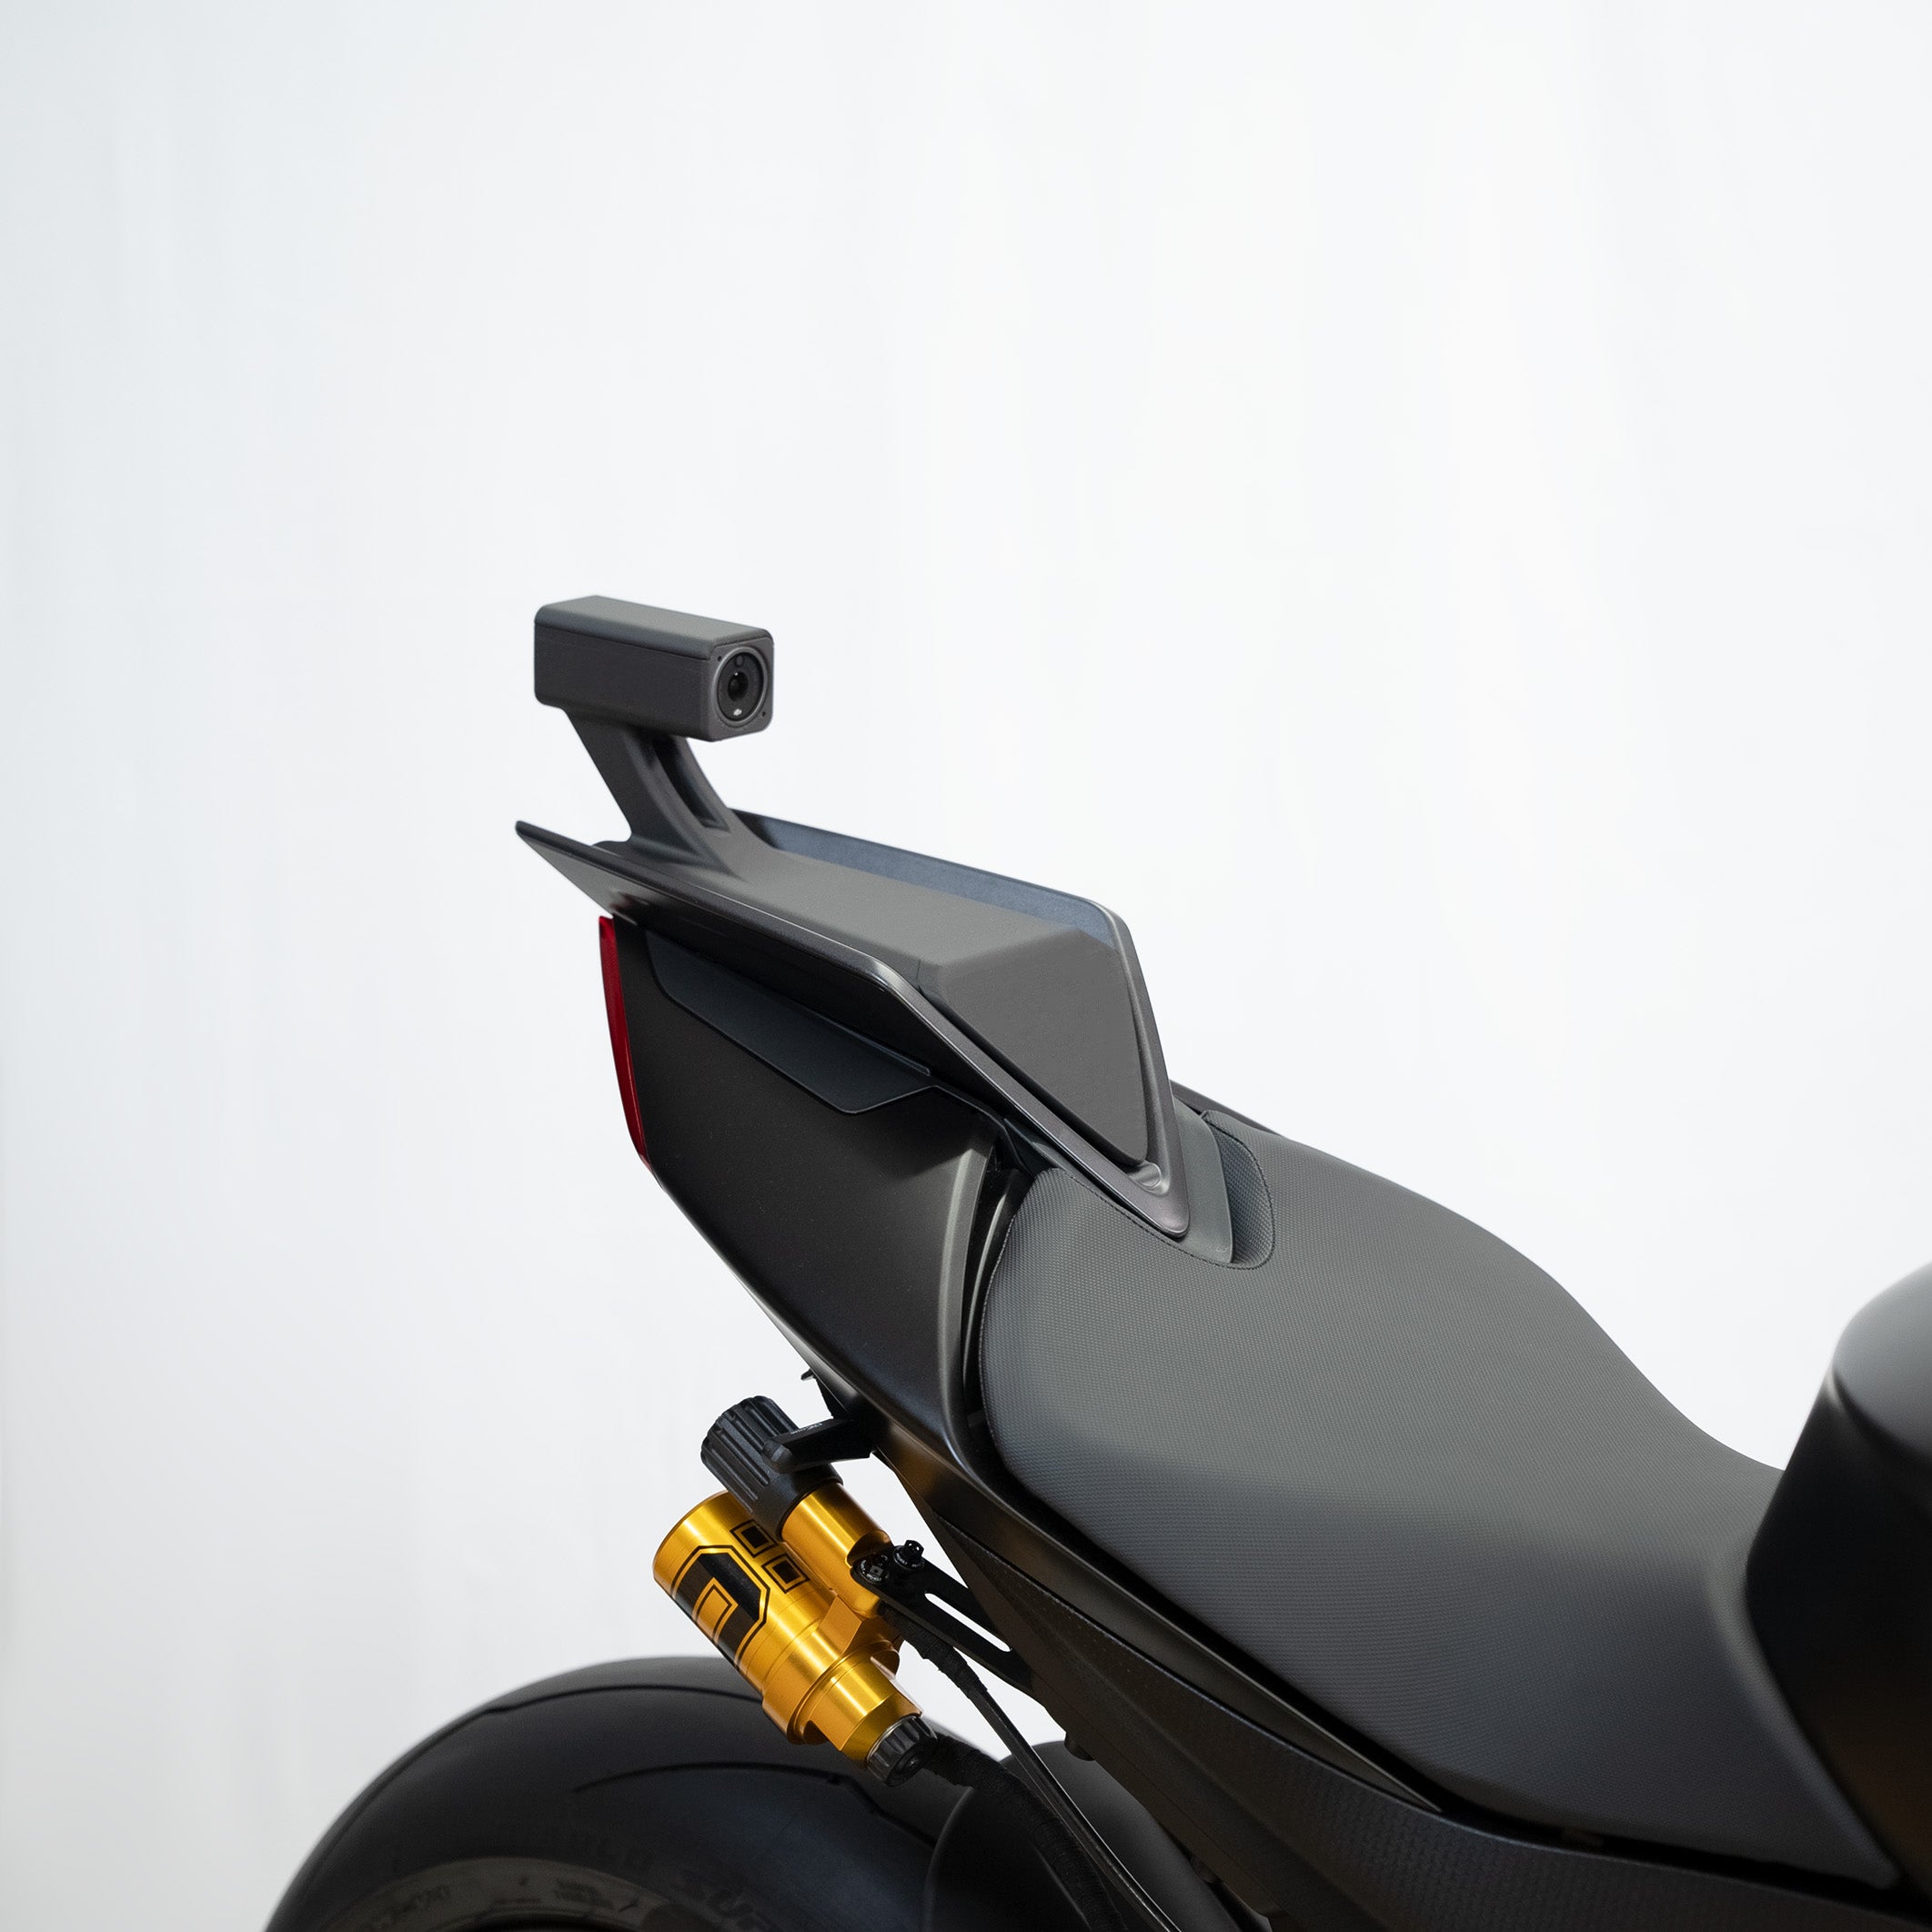
GP-CAM
Step 1. Remove the three screws holding the original foam and take out the original foam.
Step 2. Add the Forward Race Parts GP-CAM and tighten the three screws provided.
Step 3. Insert the cameras into the GP-CAM. Add the spring to facilitate future opening, then close the cover.
Step 4. Install the GP-CAM on the motorcycle.
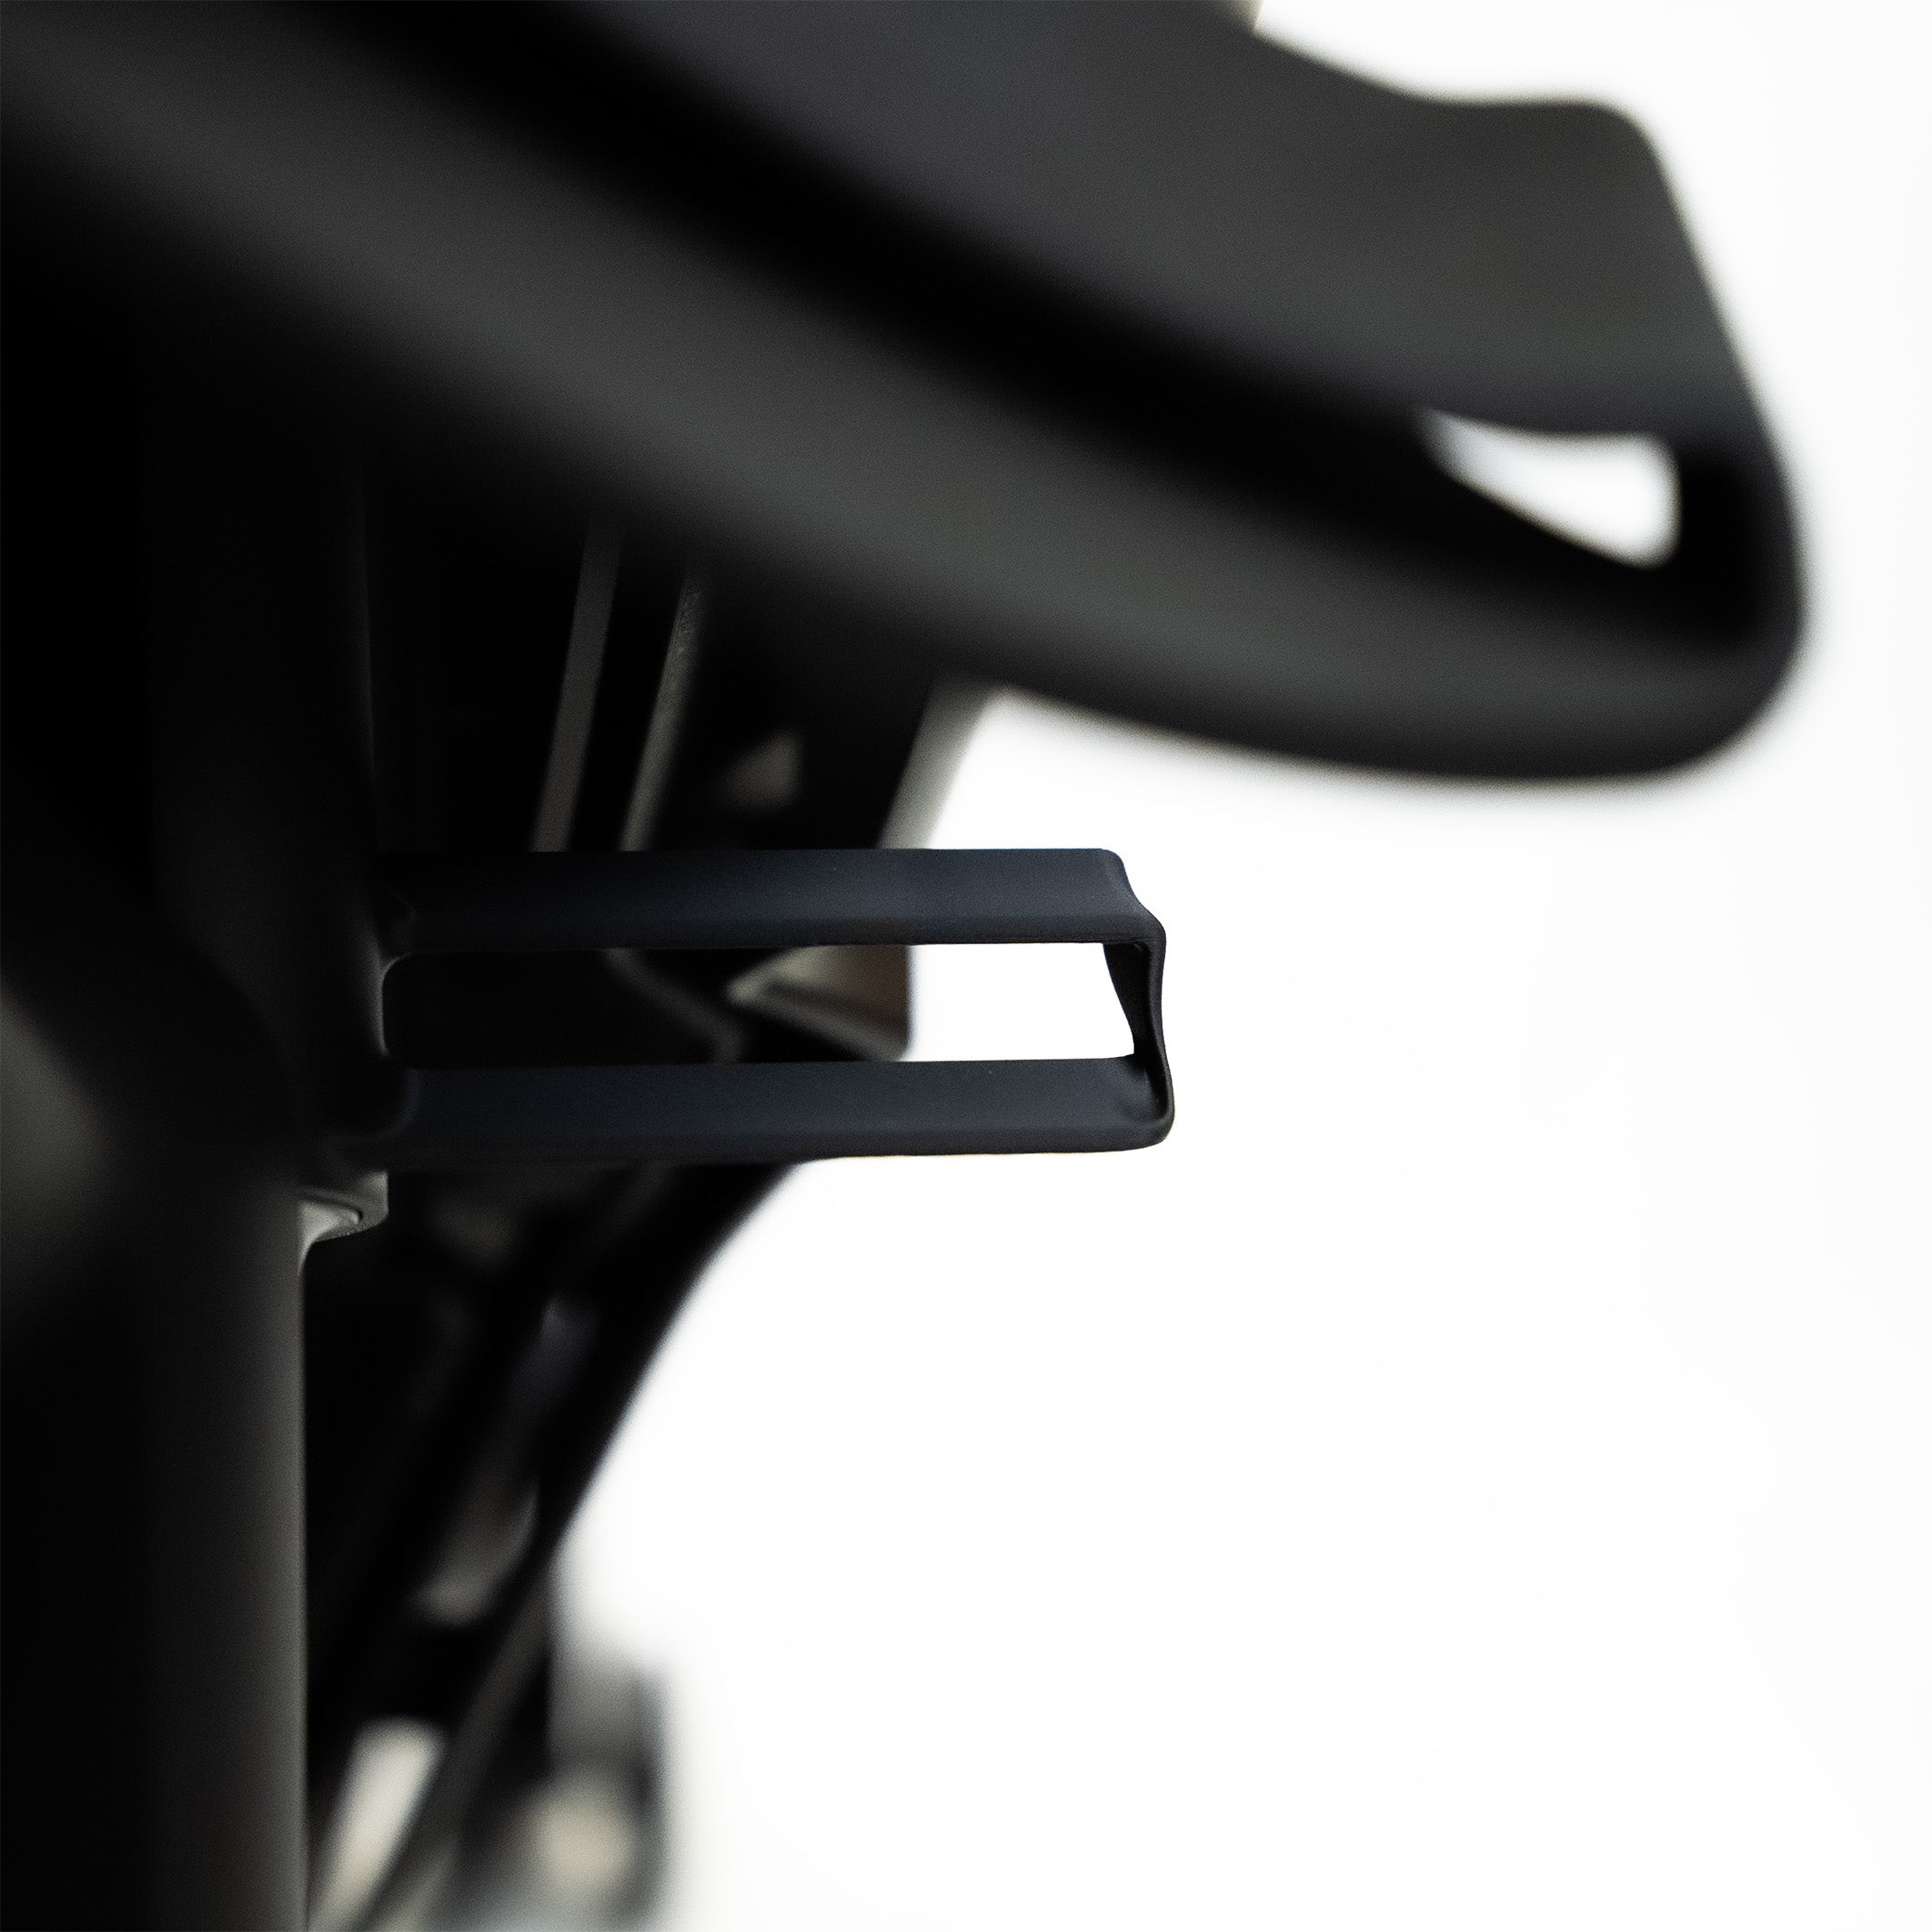
Step 5. Illustration of the best way to remove the GP-CAM if needed.
Étape 1. Retirez les trois vis qui maintiennent la mousse d’origine, puis enlevez la mousse.
Étape 2. Positionnez la GP-CAM Forward Race Parts et fixez-la en serrant les trois vis fournies.
Étape 3. Insérez les caméras dans la GP-CAM. Ajoutez le ressort pour faciliter les ouvertures futures, puis refermez le capot.
Étape 4. Installez la GP-CAM sur la moto.
Étape 5. Illustration de la meilleure méthode pour retirer la GP-CAM si nécessaire.
Video
GP Fork Winglets
Info : If you have purchased a wing, we recommend installing the fork wings first for easier access.
Step 1 : Tighten the four nuts in their dedicated locations
Step 2 : Place the half-tube against the fork and hold the clamp in place to insert the screws. Using a 2.5 mm Allen key, insert and screw in the screws one by one without tightening, starting with the most accessible ones.
At this stage, the object should stay in place while still being able to move freely.
Step 3 : Turn the handlebars fully in the direction where you are installing the part, then adjust the position of the wing so that it is as close as possible to the fairing without touching it (~2–3 mm). Then adjust the vertical position so that the bottom of the wing aligns perfectly with the bottom of the fork leg.
Step 4 : Once positioned, firmly tighten all four screws.
Warning ⚠️ : If you use a front paddock stand : with some stand models, it may come into contact with the fork wings. The wings are solid and should not break, but this could cause visual damage and shift the object out of position.
Info : Si vous avez acheté un aileron, nous vous recommandons d’installer d’abord les ailettes de fourche pour plus de facilité d’accès.
Étape 1 : Resserrer les quatre écrous dans les emplacements dédiés
Étape 2 : Placer le demi tube contre la fourche et maintenir le collier en place en vue d’insérer les vis. À l’aide d’une clé Allen de 2,5 mm, insérer et visser les vis une par une sans serrer, en commençant par les plus accessibles.
À ce stade, l’objet doit tenir en place tout en pouvant bouger librement.
Étape 3 : Braquer la direction à fond du côté duquel vous êtes en train de faire l’installation, puis ajuster la position de l’ailette afin qu’elle soit le plus proche possible du carénage sans le toucher (~2–3 mm). Ensuite, ajuster la position verticalement, afin que le bas de l’ailette s’aligne parfaitement avec le bas du fourreau de fourche.
Étape 4 : Une fois le positionnement terminé, serrer généreusement les quatre vis.
Attention ⚠️ : si vous utilisez une béquille de stand avant, avec certains modèles, il se pourrait qu’elle entre en contact avec les ailettes de fourche. Les ailettes sont solides et ne devraient pas se casser, mais cela pourrait causer des dommages visuels et déplacer légèrement la pièce.

Video
RS-GP Wing - Aprilia RS660
Info : If you have purchased fork wings, we recommend installing them first for easier access.
Step 1 : Remove the two plastic clips that hold the fairings together under the headlight. You can use a flat screwdriver if needed. Then, using the supplied Torx Allen key, unscrew the two side fairing screws as shown in the image. Perform this operation on both sides.
Step 2 : Insert the two M5 nuts into the central support bracket and position the two M5 screws into place. Position the central support bracket on the bike as shown in the image, then screw in both M5 screws using the supplied 3 mm long Allen key.
Step 3 : Insert the M4 nuts into the side support brackets. Assemble these with the half-wings using the supplied M4 screws and 2.5 mm Allen key. Don’t hesitate to slightly shift the upper cover to allow for easier screwing; it is flexible and won’t break.
Step 4 : Install the first half-wing by inserting the first M4 screw at the rear of the central support bracket. Slide it in until the rear screw seats in its channel and holds everything in place. During this step, the rear of the air guide must fit into the original fairing as shown in the image. Then, add the M4 nuts under the central support bracket and screw in the two M4 screws holding the half-wing, without tightening. Finally, insert the previously removed Torx screws and screw them in loosely. Repeat step 4 in the same way for the second side.
Step 5 : Once everything is fully installed, firmly tighten the four M4 screws on the central bracket first. To complete the installation, tighten the four Torx screws on the side fairings (not shown in the video).
Info : Si vous avez acheté des ailettes de fourche, nous vous recommandons de les installer en premier pour plus de facilité d’accès.
Étape 1 : Retirer les deux clips en plastique qui maintiennent les carénages ensemble sous le phare de la Moto. Vous pouvez-vous aider d’un tournevis plat si vous avez du mal avec le doigt. Ensuite, à l’aide de la clé Allen Torx fournie dévisser les deux vis des carénages latéraux comme montré à l’image. Effectuer l’opération des deux côté.
Étape 2 : Insérer les deux écrous M5, dans la patte de support centrale, et positionner les 2 vis M5, dans le remplacement. Positionner la patte de support centrale sur la moto comme montré à l’image, puis visser les deux deux vis M5 à l’aide de la clé Allen longue de 3 mm fournie.
Étape 3 : Insérer les écrous M4 dans les pattes de support latérales. Assembler ces dernières avec les demis-ailerons à l’aide des vis M4 et de la clé Allen 2.5 mm fournies. N’ayez pas peur de décaler le cache supérieur pour pouvoir effectuer le vissage, il est flexible et ne cassera pas.
Étape 4 : Installer un premier demi aileron, en insérant une première vis M4 au niveau arrière de la patte de support centrale. Faites coulisser jusqu’à ce que la vis arrière se loge dans son canal et maintienne le tout en place. Lors de cette opération, l’arrière du guide d’air doit se loger dans l’intérieur du carénage, d’origine comme montré à l’image. Ensuite, ajouter les écrous M4 sous la patte de support centrale et visser les deux vis M4 qui maintiennent le demi aileron, sans serrer. Enfin, insérer les vis Torx retirées au début et les visser sans serrer. Répéter cette étape 4 à l’identique pour le deuxième côté.
Étape 5 : Une fois que tout est complètement installé, serrer généreusement les quatre vis M4 de la patte centrale en premier. Pour finir l’installation serrer les quatre vis Torx des carénage latéraux (non montré à l’image).